Inspire offers a convenient mobile interface so you can check-in on your objectives or manage your 1-1 right from your mobile device.
NOTE: If you have not already downloaded the application on your mobile device, please select your operating system here: Android or iOS. Follow the instructions to download and install the application before proceeding with this article.
India Users Only: Before attempting to log in, tap the settings icon (gear) at the top of the login screen. Change the Base URL to: https://app.in.inspiresoftware.com, then proceed with the steps below.
Log in to the application.
1. Select the Inspire app icon. The login screen appears.
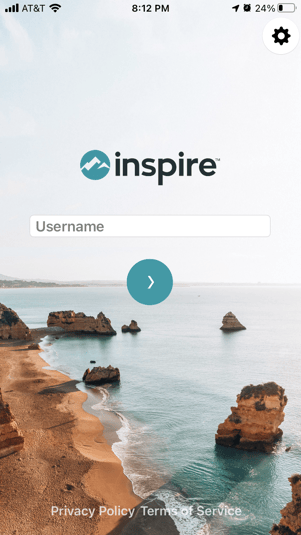
2. The login screen appears. Enter your username and select the forward arrow:

3. Enter your password and select Done. The Inspire Mobile Home Page opens:
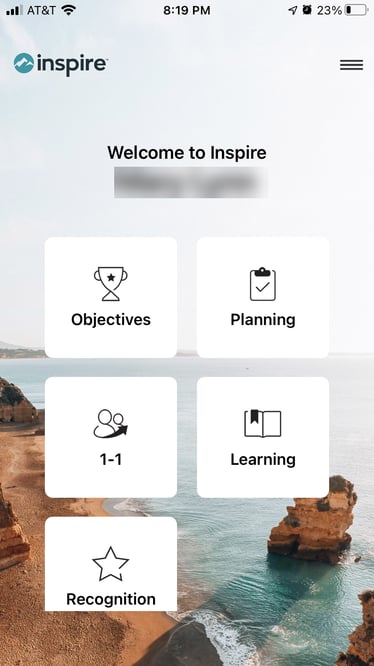
NOTE: Depending on the modules configured by your Inspire Administrator, your Inspire Module Options on your app may look different or may not have the same modules as shown in the above example.
TIP: You can always return to the Inspire Mobile Home Page by selecting the Inspire icon on the top left corner of the app.

Objectives
1. Select Objectives.
2. Select the type of objectives to view.
- Individual Objectives are listed under Individual
- Team Objectives are listed under Team.

- Select the title of an objective to display the Objective. These are the details shown for the objective:
a. Title
b. Duration
c. Current cumulative completion value of the Objective (i.e., percent complete to-date)
d. Description
e. Key Results (When viewing a Team Objective, you will only see key results where you are listed as a contributor)
* Current completion value of the specific Key Result, and
* Specific Key Result.
Check In
Select Check In.
- Enter text for your update in Enter status update...
- Enter the current completion value(s) for the specific Key Result(s) you are updating in this check-in.
- If appropriate, select and update the phase.
- Select Submit.
- Select the Inspire icon on the top left corner of the app to return to Inspire Mobile Home Page.

Planning
1. Select Planning.
2. Select View: Weekly or Daily

Option: Weekly
Current week is the default. The current date is shown; select the date to

-
- The current date is shown; select the date to display the calendar. The current week is highlighted.
- Select a different date to see the weekly view for that week.
- Select This Week at the bottom of calendar to return to this week's view.
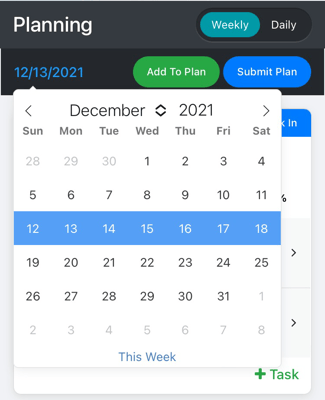
- Objectives with tasks due on a day during the currently selected week are shown.
- To add a new task for an Objective already shown on the list, select + Task.
- For an Objective not currently shown on the list, select the Add to Plan button.
- Objectives and Roles without a current task assigned as due for the week displayed are listed.
- Select the correct Objective or Role from the list.
- The Objective or Role now appears on the Weekly list.
- Select + Task to add a new task:
- Enter the following data:
- Title
- Due Date (default is current date). Enter date or use calendar icon to select new date.
- Description
- Verify the correct Objective or Role is associated
- Select the appropriate Priority.
- Select Add
- Enter the following data:
- Select the correct Objective or Role from the list.
- Objectives and Roles without a current task assigned as due for the week displayed are listed.
- The current date is shown; select the date to display the calendar. The current week is highlighted.
Option: Daily
Current days' list is default, and displayed with tasks grouped in priority order from High to Low.
-
-
- Click the + to add a new task
- Enter the following data:
- Title
- Due Date (default is current date). Enter date or use calendar icon to select new date.
- Description
- Associated Objective or Role defaults to Miscellaneous Task. If this task is associated with an existing Objective or Role, select the drop down next to Miscellaneous Task and select the correct Objective or Role from the list to correctly associate the new task.
- Select the appropriate Priority.
- Enter the following data:
- Click the + to add a new task
-
3. Working with tasks in the Planning Module (Weekly or Daily)
A. Mark Task Complete:
-
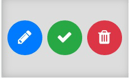
- Select the circle on the task to mark the task as completed
or, swipe left on the task and select the green check mark icon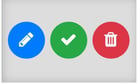
- Select the circle on the task to mark the task as completed
B. Change the priority of the task:
-
- Swipe right on the task.
- Click the gray priority reorder icon
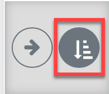
- Select the new color-coded priority (H, N, L)
C. Edit the task:
-
- Swipe left on the task
- Select the blue edit (pencil) icon
- Make edits as needed
- Select the Save icon
- Swipe left on the task
D. Delete the task:
-
- Swipe left on the task
- Select the red trash can icon
4. Select Submit Plan when you are ready to submit your plan for the week. The option will change to Plan Submitted to indicate it has been submitted.
1-1
1. Select 1-1
Learning
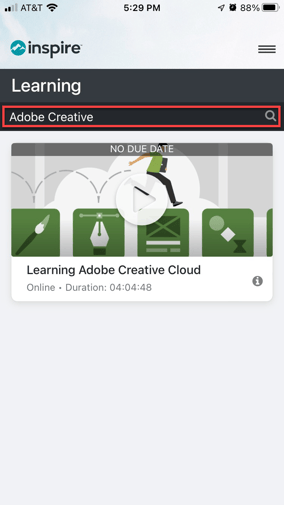
1. Select Learning.
2. Enter a search term for a course in the search field. Select the course.
Recognition
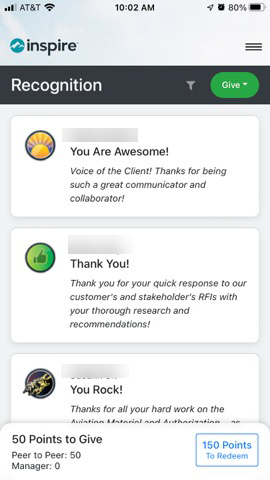
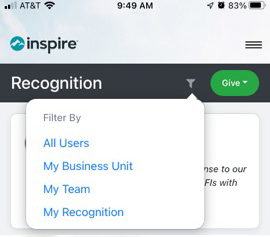
View Recognition
1. Select Recognition.
2. Select the filter, then select the filter by option.
Give Recognition
1. Select Give.
2. Determine which program to use for giving recognition (i.e., Peer to Peer (no Points) or Peer to Peer (with points), or whether it is a Manager and Teams recognition). If using points, check the number of points available to you to give at the bottom of the screen.
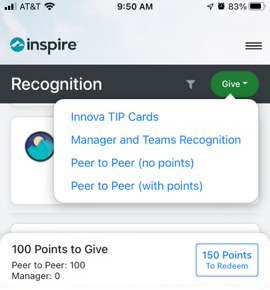
3. Select the program. In this example, the choice is Peer to Peer (with Points).
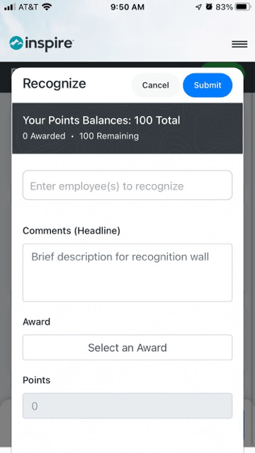
-
- Enter the name of the employee you are recognizing.
- Enter a brief Headline comment of why you are giving the recognition (note that there is a 140 character limitation).
- Tap on Select an Award, then select an award badge from the options displayed.
- Enter the number of points you are giving, then select Submit.
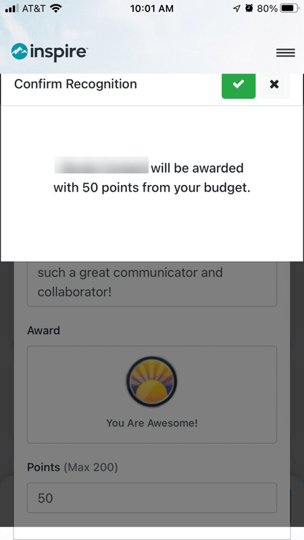
-
- Tap the checkmark to confirm the recognition.
-
- The recognition is now posted: