Viewing, Editing, and Deleting Roles
You can create roles in Inspire to define your Key Responsibility Areas (KRA). Roles cover a broad range of functional areas, while objectives provide specific outcomes required to fulfill roles’ Key Responsibility Areas. For information on creating objectives, see Adding a New Objective.
This article discusses the following topics:
Note: The labeling and images depicted in this article may differ from your version of Inspire.
To customize your Roles page
1. On the top toolbar, click the Module  button and select Roles.
2. To view your roles as a slideshow, click the Slideshow  icon.
icon.
3. On the Roles page, click the Settings  icon.
icon.
4. Click the Sort By drop-down and select one of the following options:
-
-
-
- Alphabetical: Displays roles in alphabetical order based on the role’s title.
- Date Created: Displays roles based on the date created.
-
-
-
-
-
- All: Displays both personal and professional roles.
- Professional: Displays only professional roles.
- Personal: Displays only personal roles.
-
-
To Edit or Delete a Role
1. On the top toolbar, click the Module  button and select Roles.
2. Click the Edit ![]() icon in the bottom right corner of the role you would like to modify.
icon in the bottom right corner of the role you would like to modify.

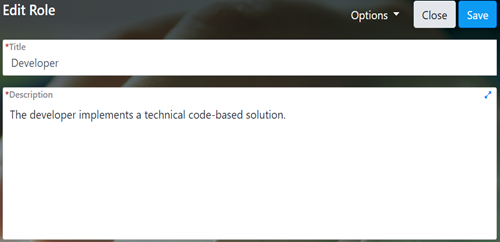
3. Edit any of the following information:
-
-
-
- Title: Enter your role’s name.
- Description: Enter your role’s statement.
-
-

NOTE: To delete the role, click the Options  drop-down and select the Delete
  link.
link.
 drop-down and select the Attributes
  link.
link.-
-
-
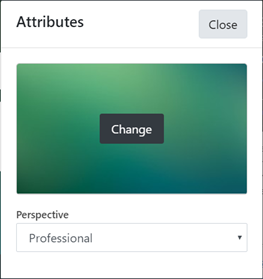
- Change image: Click the Change
 button in the placeholder image to select a new image to represent your role. This image acts as the role’s tile background and is included in your homepage slideshow.
 - Perspective: Select either Personal or Professional. The perspective will affect the role’s visibility.
- Close: Click the Close
 button to close the Attributes window.
- Change image: Click the Change
-
-

 button to save your role and click the Close
  button to return to the Roles page.