Adding a New Objective - Video
An Objective is a statement of a broad, qualitative goal designed to propel you forward in the desired direction. An objective answers the question, “What do we want to accomplish?” Objectives supply the structure and direction needed to achieve important milestones in both your personal and professional life.
Inspire includes the capability to add individual, team, and company-level objectives. This article and accompanying video discuss the basics of adding a simple individual objective.
Watch the following video for a walk through of the process or follow the steps below.
NOTE:
The labeling and images depicted in this article may differ from your version of Inspire.
Adding a new individual Objective
1. On the top toolbar, click the Module button and select Objectives.
2. If you have not yet added an objective, click the +Add drop-down button in the center of the My Objectives page and select Add Objective. Alternatively, if you have already added an objective and would like to add another, click the +Add drop-down button in the upper right corner of the My Objectives page and select Add Objective.
NOTE: Your company may have added a list of sample objectives (along with their associated Key Results).
1. To access these Sample Objectives, click the +Add drop-down button in the upper right corner of the My Objectives page and select Add Sample Objective(s).
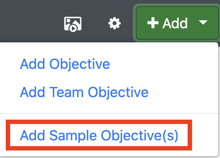
2. Available Sample Objectives will be displayed. Select the Objective you would like to add and click Add Selected.

3. The Objective, and all associated Key Results, will be added to your My Objectives page and may be edited and updated.
3. Enter the following information:
-
-
-
- Title: Enter a name for your objective.
- Start/Due Date: Select a start date and due date for your objective. Click Apply Links to choose predetermined start/due dates based on performance cycles.
- Description: Enter a statement defining what you are going to do in order to accomplish the stated business value.
- % Complete: Indicate the value of any initial progress you have made towards the objective.
-
-

5. Next, users have the option to align their new objective to a company-level key result (vertical alignment) and/or an individual or team objective (horizontal alignment). Typically, the alignment step is reserved for Team Objectives. To skip aligning your individual objective, continue to Adding Key Results, below.
Vertically Aligning an Objective
If you vertically align your objective, all progress you make towards your individual objective will count to the achievement of the larger, company-level key result.
To vertically align your objective, select the alignment drop-down menu, and click Vertical Alignment.
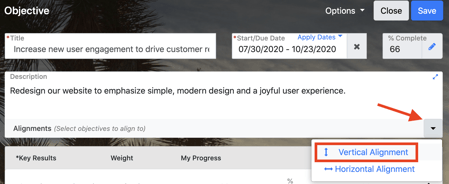
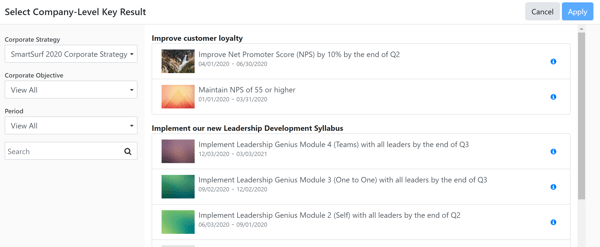
Filter the company-level key results list using the filter options on the side of the screen. You will only be able to vertically align to a company-level key result in the date range of your new objective. Then, select the desired company-level key result to align and click the Apply.
Horizontally Aligning an Objective
To horizontally align your objective, click the alignment drop-down menu, and select Horizontal Alignment.
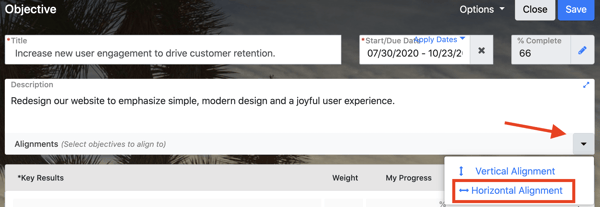
Select whether you would like to search for the desired objective by objective title or by objective owner. Then, enter your search string to view matching results.

When you have located the desired objective, click the Align button on the right. If you would like to horizontally align to more than one objective, continue searching for objectives and aligning until you have aligned to all desired objectives.
Adding Key Results
A Key Result is a quantitative statement that measures the achievement of a given objective. The Key result answers the question, “How will we know we’ve met our objective?”
1. To add key result(s) to your objective, click +Add Key Result.
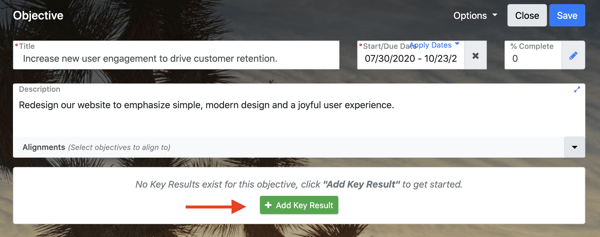
2. Enter the title of the key result in the Key Results field.

3. The Weight field determines how important accomplishing this key result is to achieving the overall objective. As you add more Key Results, Inspire will automatically assume each one is equally significant and adjust the weighting accordingly.

4. However, if one Key Result is more significant than another, you may disable auto balance weighting by clicking the Settings icon and adjusting the slider.
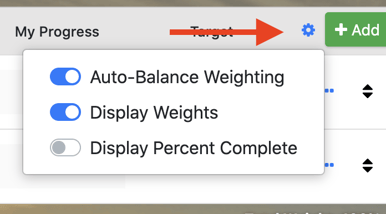
5. To edit a Key Result at any time, click the ellipsis icon on the far right of the key result and select the Edit link.
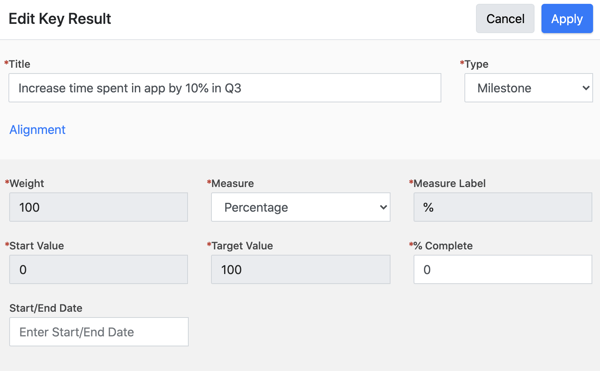
6. Click the Apply button to apply the key result changes to your objective.
7. Click the Save button to save your objective.
Additional Objective Options
Additional options are available from the Options drop-down menu at the top of the screen.
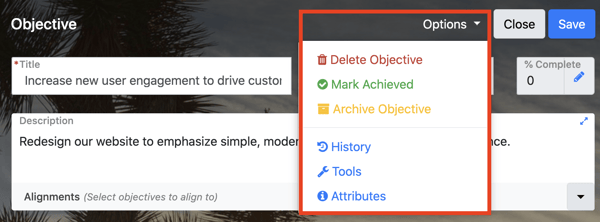
- History - As time goes by and progress is added on your objective, click the History link to view a chart of your progress over time, a change log of all edits to the objective, and a list of your objective check ins.
- Tools - If enabled by your Administrator, the Tools link may contain the SMART Objective Assessment Tool, which may also accessible from the bottom of your screen.
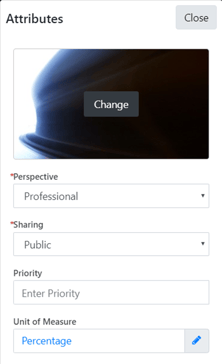
- Attributes - Attributes contains a number of ways you can configure your objective:
-
-
- Change image: Click the placeholder image to select a new image to represent your objective. This image acts as the objective tile background and is included in your homepage slideshow.
- Perspective: Select either Personal or Professional. Note that personal objectives may not be added to performance agreements and are not visible to your colleagues or supervisor.
- Sharing: Select if you would like your objective to be public or private. If you select public all status updates for the objective will be posted to the company-wide Newsfeed. If you select private, status updates will not appear in the Newsfeed.
- Priority: Enter the priority level for your objective.
- Unit of Measure: Select an alternate unit of measure for your objective.
-
-
