Setting Up an Admin Award Program and Budget
Admin awards are a great way to reward your employees for significant accomplishments, such as Employee of the Quarter, or for all-employee awards from the company.
Note: Due to the sensitive nature of admin awards, Recognition Administrators must select a specific group as eligible to give. Before creating an Admin recognition program, create your group of users eligible to give the awards.
Navigation
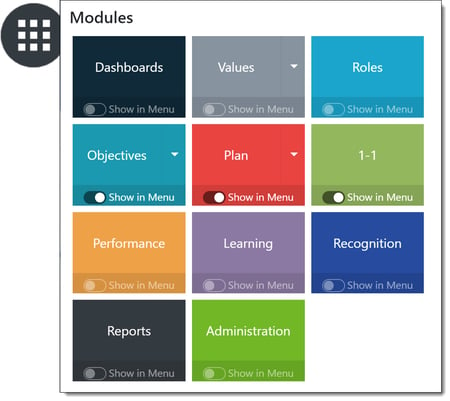
Click the Modules menu in the navigation bar at the top of the page, and select Administration.
Building an Admin Program
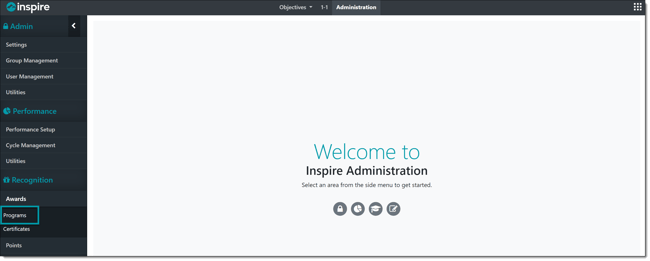
Within the navigation pane on the left side of the page, expand the Awards menu in the Recognition section. Select Programs to open the Recognition Programs page.
Click the + Add Program button.

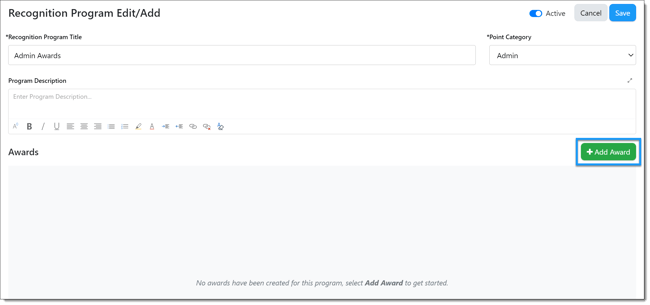
Enter a Recognition Program Title and select Admin from the Point Category drop-down menu. Optionally enter a Program Description, which is visible when giving an award from the program.
Click + Add Award to get started adding awards to the program.
Enter the required award details:
- Award Image: Assign an image to represent the award. Stock recognition award images are located in the Recognition Badges gallery.
- Award Title: Enter the name of the new award.
- Points: By selecting Fixed from the drop-down menu, you can enter a set number of Points Awarded a user gives with the award. When selecting Variable, you can enter the Points Limit (maximum number of points) a user can give with the award.
- Eligibility to Give: Select the group of user(s) who can give this award.
Note: Exercise caution when selecting a group to give, as anyone in an eligible to give group can access the Admin budget.
Optionally update the additional award details:
- Award Color: Set the background color behind the award image.
- Award Certificate Template: Select the certificate to associate with the award.
- Award Description: Describe what it means to merit receiving the award.
- Show Award as Presented By: Set an alias for users to see when receiving the award.
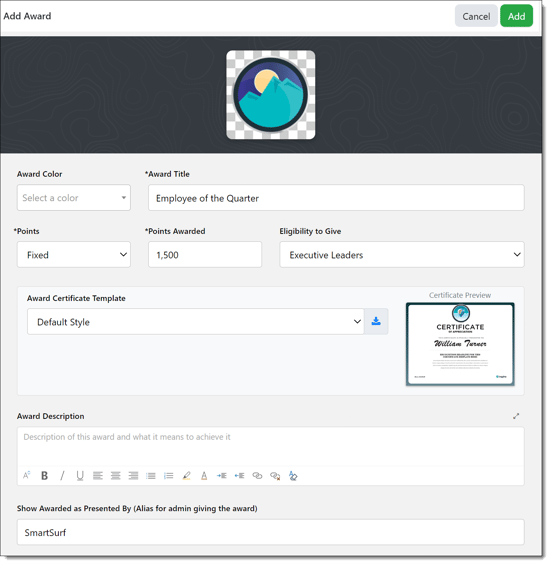
Click Add when finished, then confirm the correct number of eligible users to give based on the group selected.
Add any additional awards, Save the program, then set up your Admin budget if any points are associated with the newly added awards.
Creating and Publishing an Admin Budget
Within the navigation pane on the left side of the page, expand the Points menu in the Recognition section. Select Budget to open the Recognition Points Budget page.
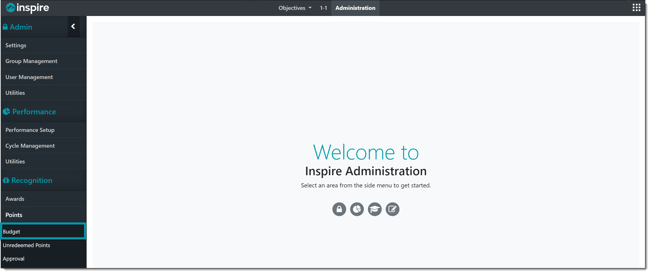
Note: You can only have one Admin Point Allocation group across published budgets. All Admin awards will pull points from the same budget.
Click Create Budget at the top right of the page.

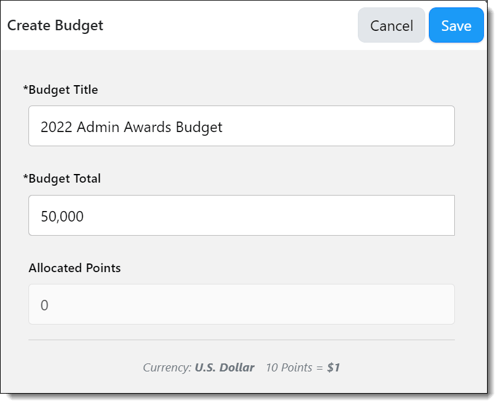
Enter the following information:
- Budget Title: Enter a title for your new budget (ex. Admin Awards Budget 2022).
- Budget Total: Enter the number of points you would like to add to your new budget. The total does not need to be exact as this can be edited once the budget is created and is still in Draft status.
Once you've entered the budget's information, click Save.
Open the budget by clicking on the Budget Title.

Click Add Points Allocation.

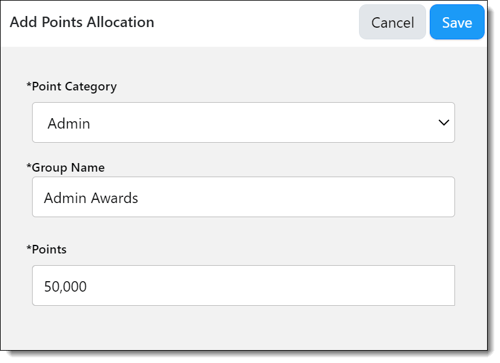
Enter the following information:
- Point Category: Select Admin from the drop-down menu.
- Group Name: Enter a name for the point allocation group.
- Points: Enter the total number of points for the Admin budget.
Click Save when finished.
When ready, click Publish Budget. For more information about publishing recognition budgets, view this article.