You can use the Weekly Calendar feature in Inspire to set specific times and dates to work on a task, as well as change the task’s due date. When you create an event in the Weekly Calendar, if you are a Microsoft O365 user, it will also sync to your Microsoft Outlook account.
NOTE: If you navigate to future weeks on the Weekly Calendar, you will only see tasks that have due dates added.
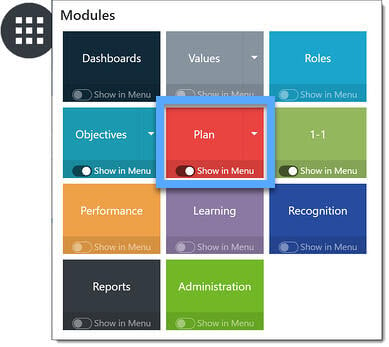
Navigation
Click the Modules menu in the navigation bar at the top of the page, and select Plan.
The Plan module always opens on the Weekly Plan tab.

Select the Weekly Calendar tab.

Add Tasks as Events on your Weekly Calendar
NOTE: The calendar will display the current seven-day week. If you would like to view a different week, click the date link located above the calendar and select the desired week using the calendar tool, or use the < or > arrows.
On the Weekly Calendar page, you can easily add a task to the calendar as an event by dragging a task from the left sidebar to your calendar. Click and drag a task to a day and time on the calendar.
TIP: You can remove the event by double-clicking the event in the calendar and clicking the Delete button in the Edit Event screen. This action will only delete the event, not the task.
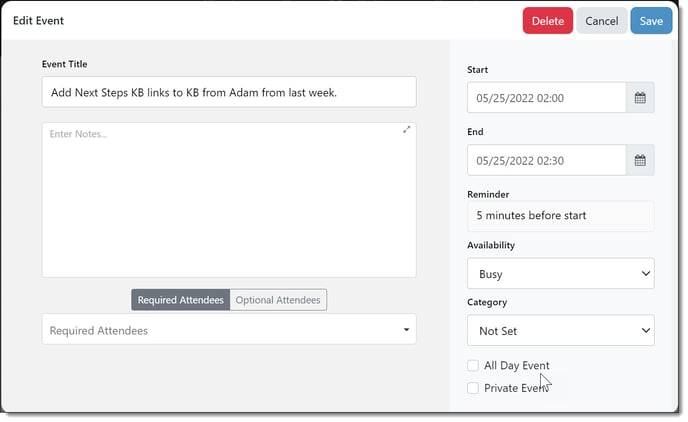
Edit an Event on your Weekly Calendar
At any point, you can double-click the event name on the calendar to edit the following options:
Event Title and Notes: Edit the name of the event and any additional information. These options will only apply to the event.
Start and End: Ensure the begin and end date and time are correct. If the task does not have a defined start and end time, you can change it to an All Day Event.
 Click Save.
NOTE for Microsoft Outlook users: You can select from the following additional options:
- Set a Reminder: Click the checkmark to set a reminder. Select the notification time from the drop-down list. The default will be set for five minutes.
- Availability: Set your availability status during the event.
- Category: Select the type of event.
- Private Event: Hide the event from other users.
- Check All Day Event if the event does not have a specified time range.
- Invite either Required Attendees or Optional Attendees. Using the typeahead feature by entering the name of the attendee(s) and select the individual from the dropdown.
Changing a Task’s Due Date on the Weekly Calendar
On the Weekly Calendar page, you can add due dates to tasks in addition to changing due dates for the selected week.
NOTE: If you want to set a task’s due date in a future week, remember that the task must already have a due date assigned or the task will not appear in the future week’s view.
For tasks without a due date or containing a due date outside of the selected week, click and drag the task from the left sidebar to the gray Tasks area below the calendar.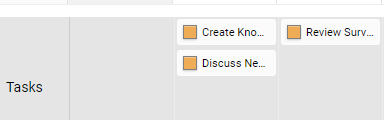
For tasks with a due date within the selected week, click the task in the gray Tasks area and drag it to a new day within the week.
Add a New Task or Event
Select +Add and use the dropdown to select either Add Event or Add Task.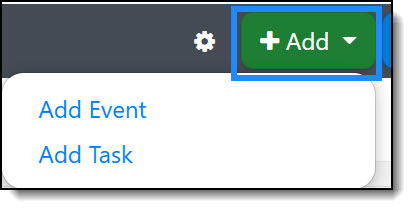
Add Event
Enter the event details on the Add Event page and click Save. For reference, if needed, please see the field descriptions listed above in Edit an Event on your Weekly Calendar. 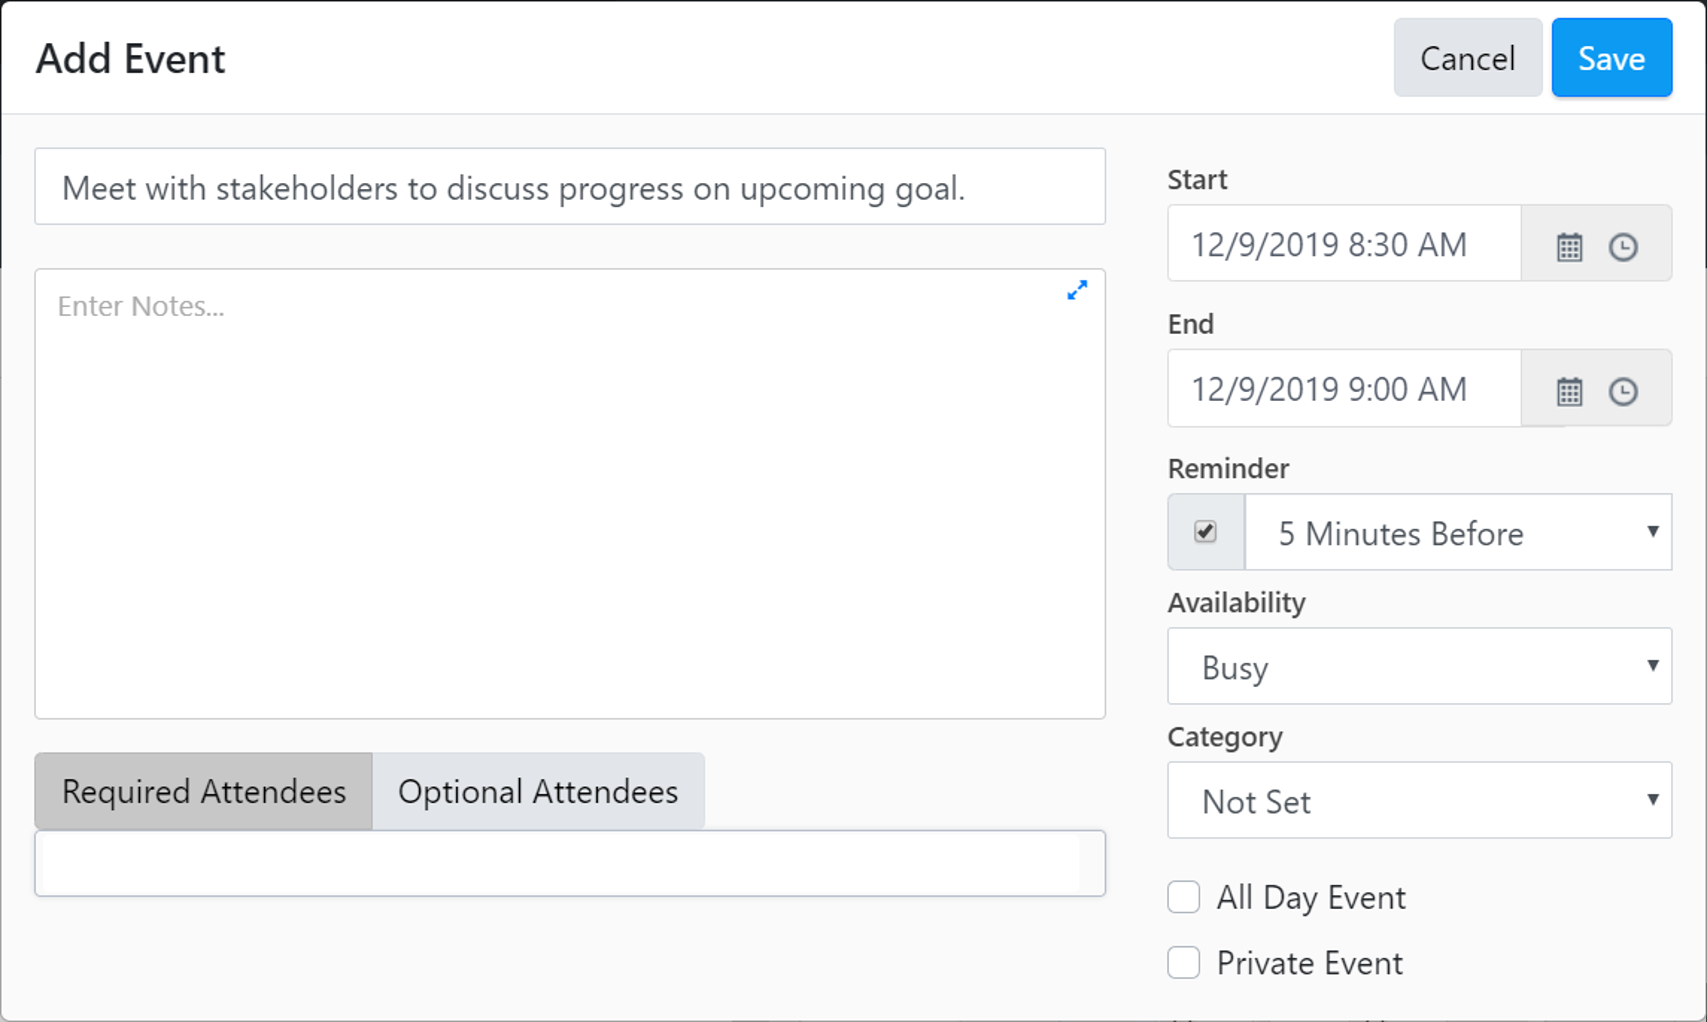
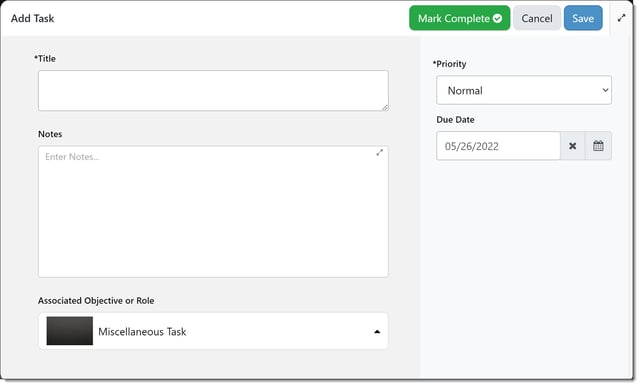
Add Task
Enter the task details on the Add Task page (see field descriptions below) and click Save.
Title: Make sure to use a descriptive title, or name, for the task.
Notes: Enter a more detailed description, and any particular notes you would like to include for the task.
Priority: Select High, Normal, or Low priority.
Due Date: Click the Calendar icon to select a due date. You can automatically apply due dates to tasks using the default due date feature in your personal settings.
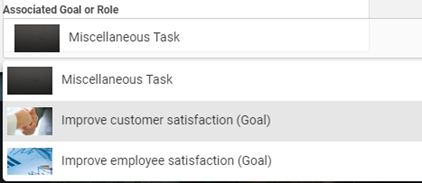
Associated Objective or Role: Move the task to a different objective or role by selecting a new one from the drop-down on this field. A list of your current objectives and roles is displayed. Remember that you can also select Miscellaneous Task if you do not want the task to be added to an existing objective or role.
Edit a Task
Double click on the task in the left hand task column to open the Edit Task page.
You may edit any of the fields as needed. Please see field descriptions listed above in Add Task.
TIP: If you want to change the objective or role the task is added to, select a new one from the Associated Objective or Role drop-down list. You can also select Miscellaneous Task if you do not want to include the task in an objective or role.
Click Save when you've completed making your edits.
Mark a Task Complete
Double click on the task in the left hand task column to open the Edit Task page.
 Click Mark Task Complete to update the task status as completed.
 Click Save.
Learn More: Weekly Calendar Page Settings