The Human Resources Administrator has certain abilities in Inspire that allow them to view and manage personal employee data.
Human Resources Administrators have the following abilities:
- User Management
- Managing Company Roles and Objectives
- Viewing the Accountability Summary Report
- Viewing Employee's Past Appraisals
- Reviewing and Approving Submitted Appraisals
Access Administrator Settings
Some Human Resources Administrator abilities described in this article are located in Management Administration. Follow the steps below to access this page.
1. Click the Modules ![]() menu and select Administration.
menu and select Administration.
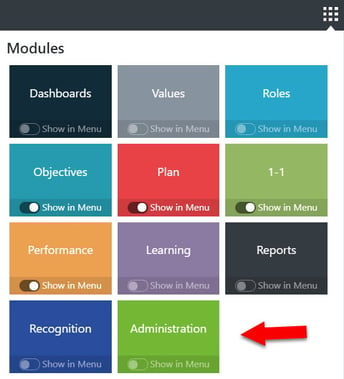
Note: The Administration module will only appear for those users who have been assigned Administrator privileges.
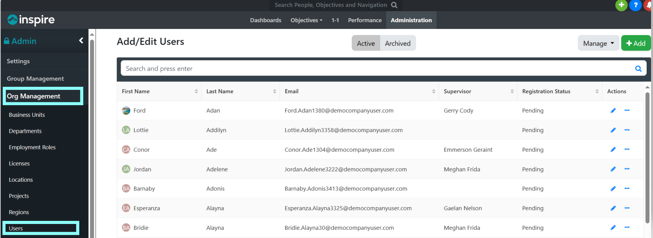
2. The Inspire Administration page will display. Use the left-hand navigation pane to locate available settings. The options will differ for each Inspire Administrator type. The Human Resources Administrator will have access to Settings and OrgManagement - Users.
OrgManagement- Users
The OrgManagement -Users section contains the settings for adding new users or editing/deleting existing ones. Human Resources Administrators may also edit a user's profile, add supervisor information, or assign an Administrator role.
- Add/Edit Users - Add Users, or Edit Users or, work with your Client Success representative to batch import all your employees at once.
- Licenses - Review your current Inspire licenses, request additional licenses, or assign/remove user licenses to employees.
Add User
To add a new user to Inspire, follow the steps below.
1. Navigate to Administration- OrgManagement- Users
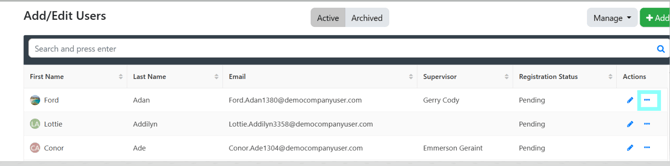
2. In the left-hand navigation pane, select User Management, and then Add/Edit Users.
3. Click +Add to add a user. Complete all required fields in the Add New User window. Adding optional information like Business Unit or Department will make it easier to sort and select users later.
4. Select the Authentication tab to enter the Single Sign-On authentication provider your company will be using. Enter the new user's time zone and then select Save.
5. Once the new user has been saved, click the Supervisor tab and select the supervisor's name from the Current Supervisor drop-down list. Then click the green Save ![]() icon to save.
icon to save.
6. If the user will require Administrator privileges, select the Permissions tab. There are six Administrator types: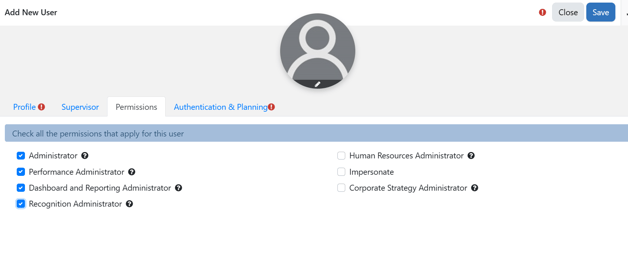
- Administrator - controls how Inspire appears to the end users, what modules are available and what default image libraries are used. Creates and manages Groups, add and edits users, assigns Administrator privileges, manages licenses, and has access to the Job Scheduler.
- Performance Administrator - configures the Performance Agreement and Performance Cycle settings and can view the Completion Status report.
- Human Resources Administrator - Adds and Edits users, access the Accountability Summary report and can view employee's past appraisals.
- Corporate Strategy Administrator - the CSA can add/edit the Corporate Strategy.
- Dashboard Administrator - customizes the company dashboard
- Recognition Administrator - customizes the available badges and manages points and escalation awards.
7. To assign an administrator role, or roles, check the corresponding box and select Save. The new user is saved and will appear in the active user list.
Edit User
To edit a user to Inspire, follow the steps below.
1. Open the Management Administration page.
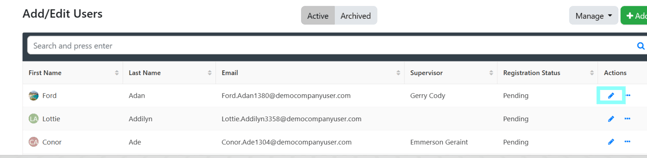
2. In the left-hand navigation pane, select OrgManagement, and then Users. A list of active users will display.
3. Type the user's name in the Search field, corresponding users will display. Click the Edit icon to open the user profile and edit their information.
4. To change the user's password or photo, click the Ellipsis icon.
Licenses
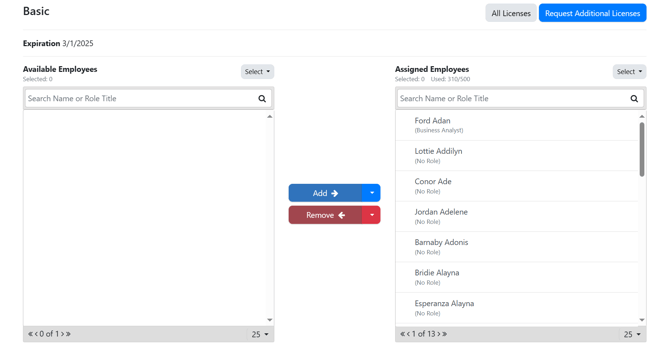
This section displays the current Inspire licenses - how many have been purchased and how many are currently assigned. Administrators can request additional licenses at any time by using the Request Additional Licenses button to display the contact details for Inspire Software.

1. Navigate to Management Administration.
2. In the left-hand navigation pane, select User Management, and then Licenses.
3. To grant an Inspire license to an employee, click the Edit![]() icon under Actions.
icon under Actions.
4. Enter the name of the employee in the Search Name or Role Title field. Alternately use the Select pull-down menu to select All employees.
5. Use the Add (or Remove) icons to assign the selected employee(s) an Inspire license.
Managing Company Objectives and Roles
Use this section to create a list of Sample Objectives (or Roles) that will appear to new users who have not yet added their first role or objective. This list allows new users to easily select a prescribed objective.
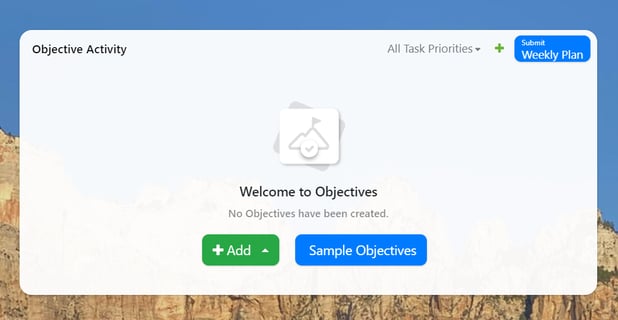
There are two ways to add objectives to the Sample Objectives drop-down list: create a new, custom objective unique to your company or, choose from a pre-populated list of stock objectives.
To add a new, custom Objective, follow the steps below. To choose from the list of stock objectives, skip to the next section.
1. Open the Management Administration page.
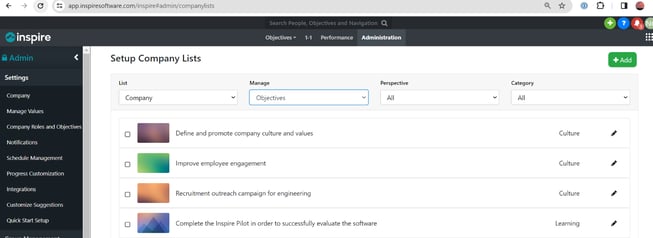
2. In the left-hand navigation pane, select Settings, and then Company Roles and Objectives.
3. Set the List drop-down menu to Company.
4. Set the Manage drop-down menu to Objectives.
5. Use the Perspective drop-down to determine whether your sample objectives are personal or professional. Note that the Perspective menu will not appear if Personal Perspective has been disabled in Company settings.
6. Next, click the green +Add button to add a new objective.

Use this section to create a list of Sample Objectives (or Roles) that will appear to new users who have not yet added their first role or objective. This list allows new users to easily select a prescribed objective.
7. In the New Objective window, enter an objective title and description, and then select an image for your new objective. Click Save.
8. The new objective is saved and will appear in the Sample Objective drop-down list when new users are adding their first objective.
9. To edit or delete an objective, click the Edit pencil icon.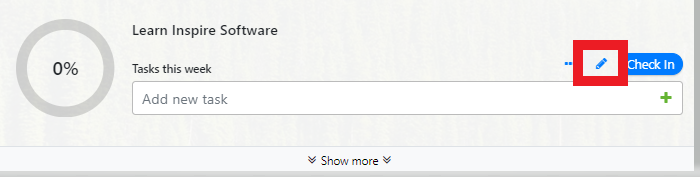
Note: This same process may be used to add Roles to the Sample Roles drop-down list that appears to new users when Adding their First Role.
 To add one of the pre-populated Stock objectives to the Sample Objectives drop-down list, follow the steps below:
1. Open the Management Administration page.
2. In the left-hand navigation pane, select Settings, and then Company Roles and Objectives.
3. Set the List drop-down menu to Stock, the Manage drop-down menu to Objectives, and the Perspective drop-down menu to Professional. This will display a selection of professional stock objectives. Note that the Perspective menu will not appear if Personal Perspective has been disabled in Company settings.
4. To add one of the stock objectives to the Sample Objectives drop-down list, select + To My Company List
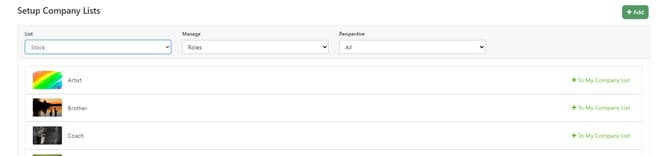
5. The stock objective will now be listed in the Sample Objectives drop-down list that appears to new users who have not yet added their first objective.
Note: This same process may be used to add Roles to the Sample Roles list that appears to new users when Adding their First Role.
Viewing Employee's Appraisals
When viewing an employee's profile in Inspire, Human Resources Administrators can view all past appraisals. To view an employee's past appraisals follow the steps below.
Note: Performance must be enabled to view appraisals.
1. In the Universal Search field at the top of the page, type an employee's name.
2. Click on the employee's profile.

3. On the employee's profile page, click the Appraisals  tab.
tab.
4. Links to past appraisals display, along with general information about each appraisal, including the employee's supervisor, employee's GPA and supervisor's GPA.
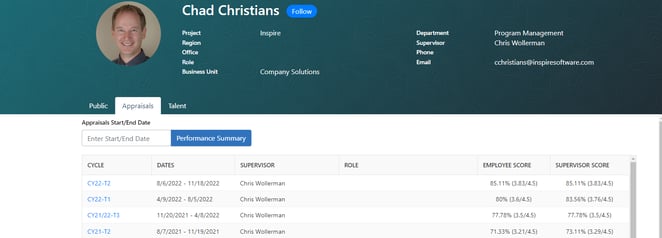
5. Click on any Performance Cycle to view the specific appraisal.
Reviewing, Approving or Rejecting an Appraisal
At the end of each performance cycle, Inspire's appraisal process allows employees and their supervisors to review the progress made over the previous period, examining areas of excellence and identifying where additional progress can be made. This process is marked by a number of stages:
- Employees complete a self-assessment and submit it to their supervisor.
- The supervisor reviews the employee self-assessment and completes an appraisal.
- The supervisor submits the appraisal for Human Resource approval.*
-
An Inspire Human Resource Administrator approves or rejects the appraisal.
- If the appraisal is approved, the supervisor is notified and can complete the final steps in the process with their employee.
Note: Not all organizations will require a Human Resource Administrator to review performance appraisals. This step may be enabled or disabled by a Performance Administrator. To enable or disable HR Review, see this article.
How to Review, Approve or Reject an Appraisal
1. Click the Modules ![]() menu and select Reports.
menu and select Reports.
2. On the left side of the page, expand the Performance section.
3. Select Completion Status to open the report.
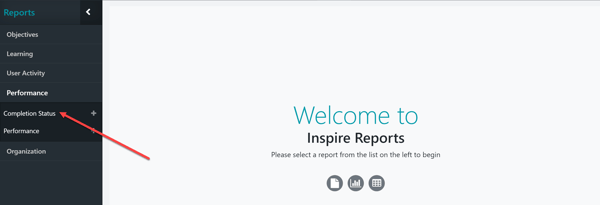
4. Click the numerical hyperlink for Participants Incomplete in the HR Review Cycle Step.
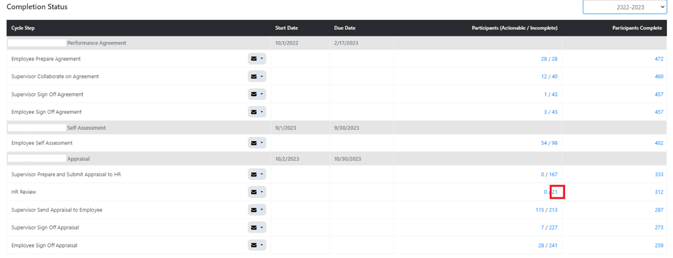
5. All appraisals that have been submitted by supervisors and need approval will display on this page. You can find an employee by typing their name in the search field.

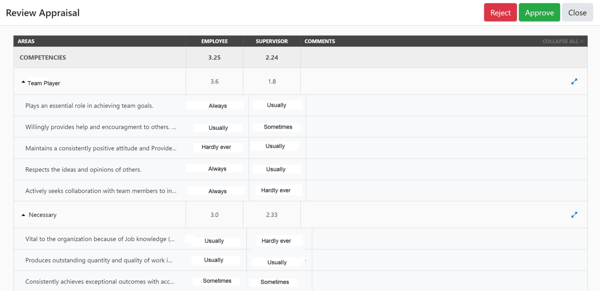
6. Review the Appraisal, and then click Approve or Reject.
- Approve: Click the Approve button if the Appraisal is satisfactory. There is no further action needed from the HR Administrator.
- Reject: Click the Reject button if the Appraisal is not satisfactory. You will then be prompted to enter remarks about why the appraisal is being rejected. When you have finished entering your remarks, click the Confirm Rejection button.
Note: If you reject an Appraisal, it will be sent back to the supervisor to edit and resubmit. Once the Appraisal is resubmitted, it will need to be reviewed and approved.