- Inspire Online Help Center
- Dashboards
-
Getting Started
-
Home Page
-
Corporate Strategy
-
Objectives
-
Plan
-
1-1
-
Performance
-
Learning
-
Recognition
-
Talent
-
Dashboards
-
Roles & Values
-
Reports
-
Inspire Mobile Interface
-
General - Managing Your Inspire Instance (Administrators)
-
Objectives/OKRs Implementation (Administrators)
-
Performance - Managing Your Inspire Instance (Administrators)
-
Recognition - Managing Your Inspire Instance (Administrators)
-
Inspire Integration
-
FAQs
-
Leading a Team OKR
-
New Features
Adding Widgets to Your Dashboard
On your dashboards, you can add widgets to access different functionalities. Using widgets, you can check in on your objectives, view your calendar, add tasks, track your team’s progress, and more.
To add a widget
- On the top toolbar, click the Modules
 menu and select Dashboards.
 - Click the Edit
 icon in the upper-right corner to edit the dashboard.
 - Click the + Widget
 icon in the upper-right corner.
 - On the widget list, click the Add to Dashboard
 button next to the widget you would like to add.
You can also search for a specific widget using the search feature at the top or select a widget category.
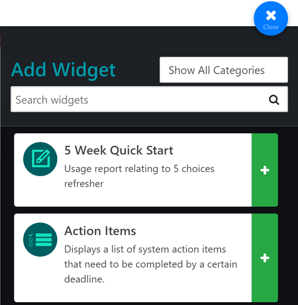
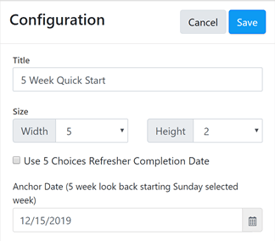
NOTE: Some widgets have additional customization options available.
6. Click the Save  button.
7. If you want to adjust the widget position, click the Move  icon in the center of the widget, then drag the widget into place.
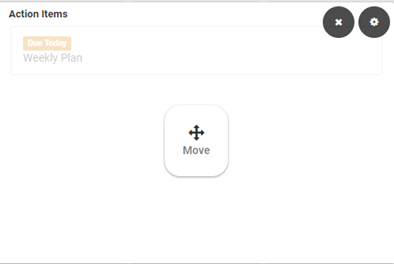 8. If you want to change the widget size or title after you’ve added the widget, click the Settings
  icon in the upper-right corner of the widget.
9. Click the Close ![]() icon.
icon.
10. Click the Done ![]() icon.
icon.